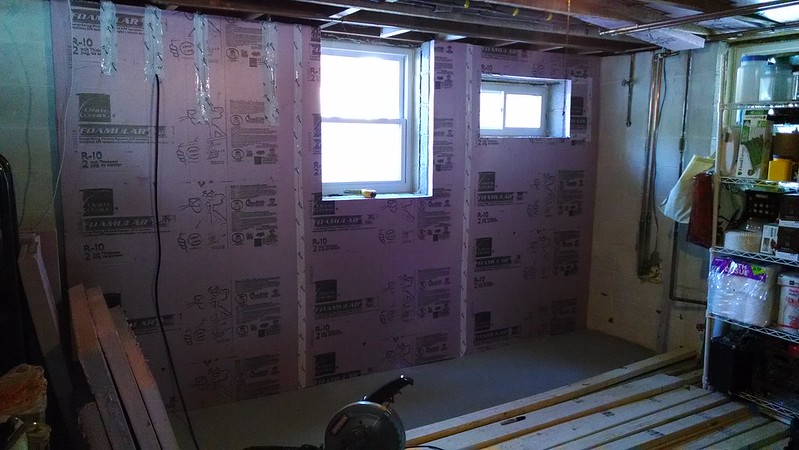
I've been able to make some pretty good progress the past two weekends. The wall you see above is now fully framed. The rack you see to the right in this picture is four foot wide, and full of canning supplies and canned goods...and there is another one to the right of it, just as loaded. Those have been moved to the wall above, making way for me to dive into the other wall. Man, am I glad we had the foresight to buy wheeled shelving.
I had to tackle more than just the framing on the second wall. First, since I would be working by the boiler pipes and I was tired of burning my arm on them, I bought enough pipe insulation to cover all of the boiler pipes. I also covered the main line coming in from the well, because in the summer with the humidity up this pipe would sweat and drip water on the floor. Problem solved!
 |
| Boiler feed and return lines on the left. Well pump supply line on the right. |
I also had to remove and cap a water line running to an outdoor spigot. As I've mentioned previously, I'll be running new hot and cold lines to a new hot/cold outdoor faucet. Seriously...I am way too stoked about having a faucet with hot water outside. :) As you can see in the pic above, by this point I also had the wall fully insulated.
With all of the above done, there was nothing left to do but start on the framing. I started on it and finished it today. :) Check it out.
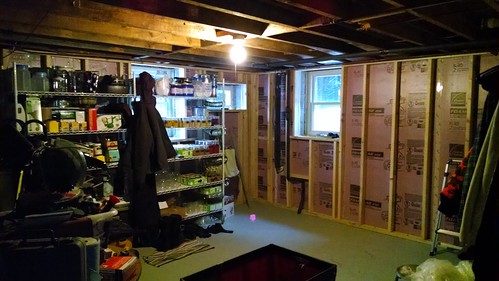

The boiler and water pipes will run along the outside of the drywall. I'll be making a small bulkhead/closet in that corner, to cover the pipes and still give access to the main well pump shutoff valve. I really had to play with the spacing of the studs, to maintain 16" on center and still have them fall where the pipes weren't.
I had considered running all new lines to contain them within the wall. That thought was very brief...like milliseconds. Seriously, those lines represent our heat and our water supply. With me, plumbing projects always end up taking far longer than anticipated, and costing far more than budgeted. We'd have been freezing, thirsty, stinky, and broke if I hadn't opted for the bulkhead/closet. ;)
The PVC waste pipe and cleanout you see on the right in the lower picture will be in a yet-to-be-built good sized closet. We thought about just enclosing that and some other existing plumbing in that area in a bulkhead, but we could really use the storage space. So, a closet it is!
The next section I'll be framing is far and away the most difficult. I'll have several large obstacles to deal with...like a washer, a dryer, a chest freezer, a sink, a circuit panel, and more plumbing and electric attached to the walls. All of this is why I chose to do this section last. I'm going to need everything I've learned so far to keep me from completely mucking it up.
It sure does feel good to be making some progress! :)
Until next time...