Chronicling the cleanup and restoration of our house and property in northern Michigan

Chronicling the cleanup and restoration of our house and property in northern Michigan
_____________________________________________________________________________________________________________

Monday, March 19, 2012

Honest! It's not another basement update!

Sunday's projects were all about staying out of the basement.  After finishing up the framing of the first section, we decided to take a break before plunging headlong into the next section.  A couple weeks ago we bought a new ceiling fan for the living room, and new faucets for the kitchen and bathroom.  Eureka!  These will keep me busy, and keep me out of the basement!

The old ceiling fan looked like something from that 70's show, and would spark when pulling the chain for the light.  Long story short, we didn't use it.  Pretty, isn't it?!

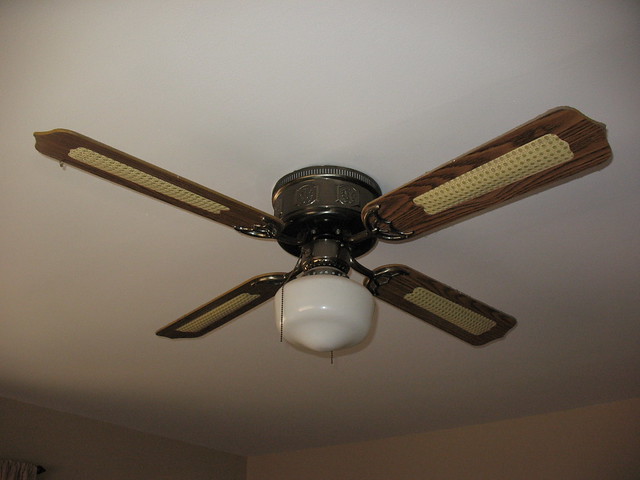
Existing Ceiling Fan
Here's the new and improved fan.  Five larger blades, plenty of wind, and no sparks!

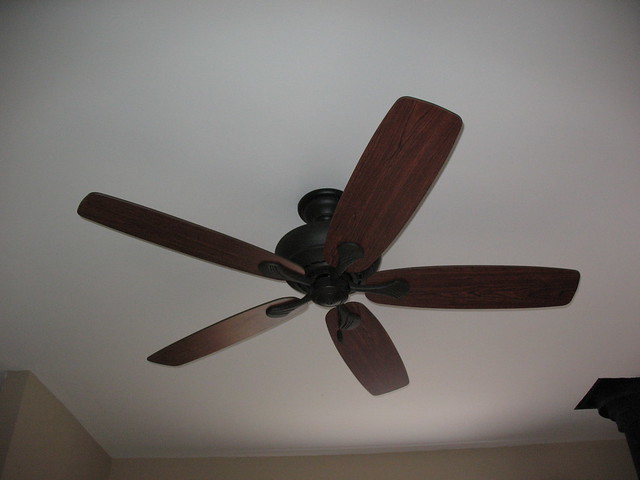
Replacement Ceiling Fan
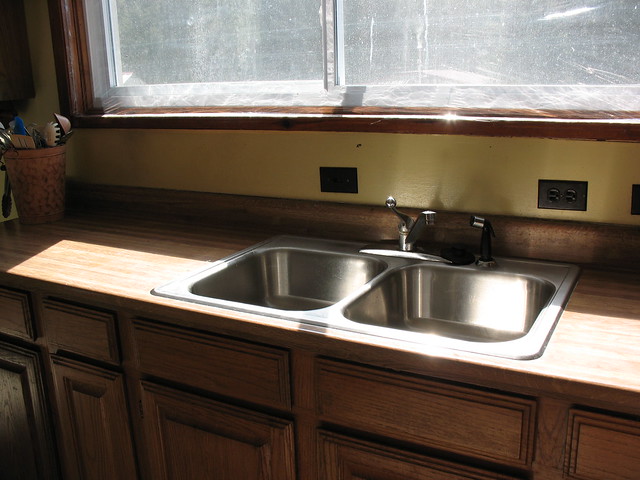
With the house sitting vacant for so long the seals on the faucets in the kitchen and bathroom are leaking.  They're not just dripping...they're also leaking around the handles.  Also, the sprayer is completely non-working.  We had a similar issue in Ohio and I replaced the faucet, and Shelly got used to using the sprayer.  See what I get for spoiling her?  ;-)

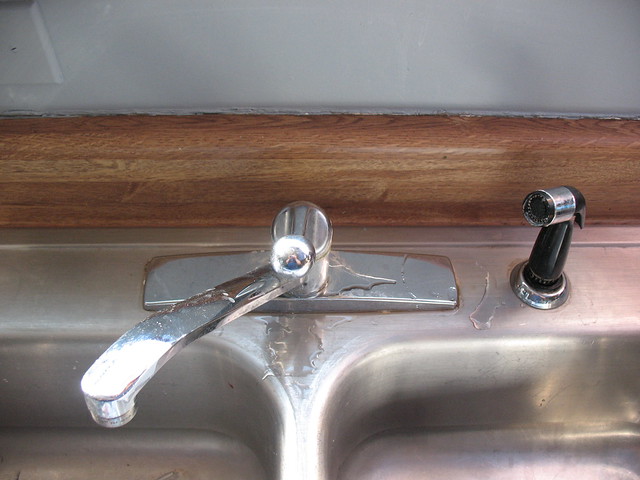
The existing kitchen faucet.
There's water everywhere!  AAAAAGH!
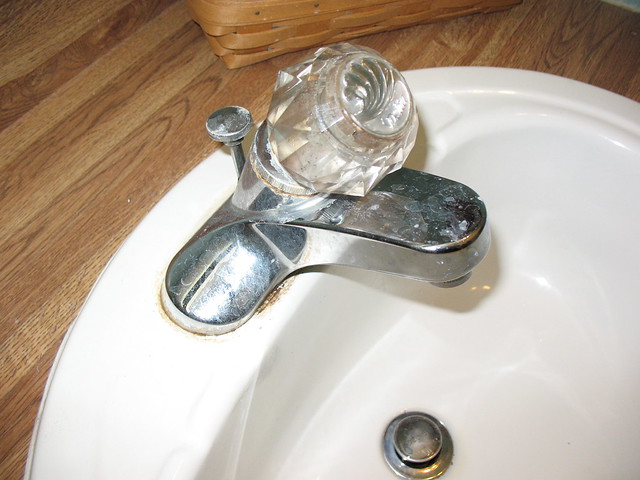
The existing bathroom faucet.
Yeaaah...it's gotta go.
Now, for the big reveal...all dripping with enthusiasm!!!  What, you'd prefer some watered down update? ;-)

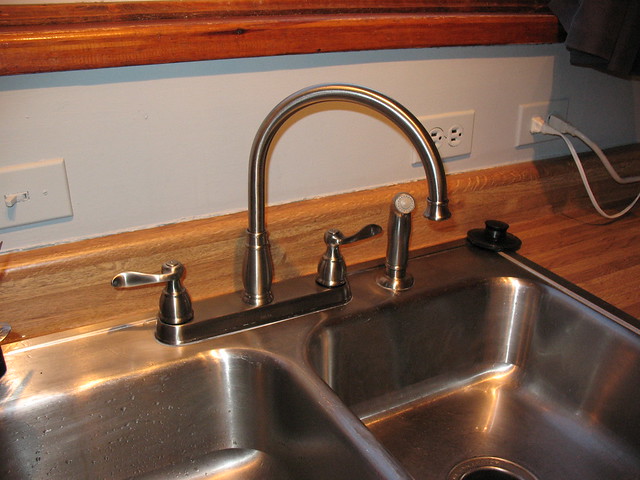
New kitchen faucet.  Dry and wet where they're supposed to be,
and a working sprayer!
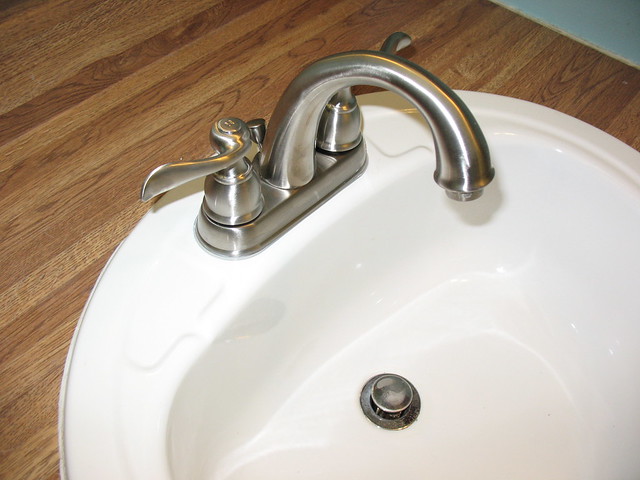
New bathroom faucet.
Soooo much nicer.
This was a nice deviation from the basement project, and all three improvements were immediately felt.  The ceiling fan immediately went into service, what with the freakishly warm temps.  March...northern Michigan...80 degrees?!  

It'll likely be a few weeks before our next update.  I'll be traveling for work this week, and then for the weekend we're out of town visiting with friends and then visiting our son Kyle.    So, we'll talk to you all in a few weeks!


Saturday, March 17, 2012

Blueing Up The Kitchen!

While Michael and I were in the basement framing walls, Shelly was busy upstairs...very busy!  She tackled our kitchen, giving it a fresh coat of paint and some updating.  Mike and I pitched in a little...very little...and installed two new light fixtures.  Shelly did all of the heavy lifting on this project, and she ROCKED it.

The old color was yellow, which is not necessarily a bad thing.  But...and you knew there'd be one...we're pretty sure that it was the original paint from when the house was built in the 70's.  Couple that with the soot from long time use of a wood stove, and I think you get the picture.  If not, I've posted some before pictures below.  :-)

Lovely sooty yellow, isn't it? 
Over the stove and refrigerator.  That shelf isn't going to make
the final cut.  ;-)
If you're wondering why the electric outlets
are sideways, so are we!  Convenient, though,
having them so close to a water source.  :-p
This light fixture?  Yeah, it's going with that shelf you saw.
That lovely green light hanging over the table?
It's also not making the cut.  While you're looking,
check out that floor.  No, that is not an optical illusion.
We really do have two different floor tiles.
Okay, that's enough for the before shots.  Let's get on to the GOOD STUFF!  Shelly went with a pale blue for the walls.  She's also going to be painting the cabinets, but that'll be for another day.  Check this out!  :-)

Stunning difference, huh?  Shelly rocks, no doubt about it.
I told you that shelf was a goner.  ;-)
It all looks so clean.  Sooty yellow never looked clean. 
Our little dining area.  Check out those open windows.
March in northern Michigan, and we have the windows
open.  Bizarre weather, but we're enjoying it!
The new light fixture over the table.  The green chandelier would have
clashed...well, with everything.
The matching, but much larger, light fixture over the sink.
This one was a PITA to install, and there just might have
been some profanities uttered.  OK...a lot of profanities
were uttered.
I really can't wait to see what it's going to look like with the cabinets painted.  As good as this all looks compared to how it did, it's strange to think that all of this is temporary.  After we're done with the basement finishing project the kitchen is going to get gutted and redone.  But, knowing that the basement is probably going to take us a year at the pace we're able to go, we knew we couldn't live with sooty yellow, a green chandelier, and a fluorescent shop light over the sink.  Shelly is creating something for us now, that will be easy to live in until we're able to make like we really want it.  :-)

Until next time!


Framing Worthy Of A Picture

The past few days have been pretty busy here at Shangri La.  Shelly and I are continuing our divide and conquer approach, with me still working on the basement and her painting the upstairs, this time in the kitchen. I considered putting both the basement framing and kitchen painting into one post, but Shelly's work in the kitchen deserves a post all of its own.  I'll post that here in a bit.  :-)

Our last update (Another Quick Basement Update) had the walls in the 1/4 of the basement fully insulated.  Today Michael and I knocked out the framing.  This was my first framing project, and I have to say that I am very pleased with how it came out.  My research paid off, and having the right tools sure did make a huge difference.  Probably the coolest tool acquisition was the Hammer Shot.  I ask you, how could shooting a 2 1/2 inch spike through a 2x4 and into concrete using a .22 caliber load and a hammer not be cool?!!

Here's the finished product.


We won't be running electrical or plumbing, or doing any drywall until all of the walls are framed.  With the framing done in this section we'll now be moving on to the next 1/4 of the basement.  Here's the next area we're tackling.

Everything you see there will be moved over to the just completed area.  Then, we start all over again...demo, rerouting electrical, cleaning, caulking, painting, insulating, framing.

That's it for this update.  Tomorrow we'll tackle moving everything over, and begin the demo and prepping of the walls.

Until next time...which will be later tonight.  :-)

Monday, March 12, 2012

Another Quick Basement Update

This is what our son Michael and I managed to get done this evening.  We're going with a two inch thick Foamular rigid foam insulation, and 2x4 framing and drywall in front of it.  When we're done well have a combined insulation rating of R12.55.  That's a combination of the R10 for the rigid foam, R1.11 for the cinder blocks, R1 for the air space, and R0.45 for the drywall.  All of the joints are taped with Tyvek tape, and we'll be laying a bead of low expansion foam insulation along the bottom of the rigid foam to fill any gap by the floor.


Next we'll be starting on the framing.  Once that's up, we'll move the home gym over to this area and start the whole process again.  Two more areas to go after that, then we'll take care of plumbing, electrical, and drywall.  This is going to take a while, folks!

Slow going in the basement...

The basement project continues to move slowly forward, with emphasis on the "slowly".  What we're finding living up here is that there is always something to do, and sometimes the something you planned to do has to give way for something that just plain must be done.  For instance, I was going to work on the basement, and then our appliances died and we spent the weekend moving in and setting up the new appliances.  Another example, I was going to work on the basement but instead spent the weekend clearing 17 inches of snow from the driveway and chainsawing trees that were blocking the road.  I have more, but you get the idea.

So, the progress is slow but it is moving inexorably forward.  Our last update had the walls cleaned, caulked, and painted with Dry Lok, and the floor had its first coat of paint.  This past Friday evening I laid down the second coat of floor paint.  That has us ready to put up the insulation and begin the framing.  Remember, we are only working in one quarter of the basement right now.  We're actively using the basement, so we can only do part of it at a time...moving our stuff after we finish each section.

This is going to be my very first framing project, and I have to admit that I'm still a bit intimidated by it.  I have some working knowledge, and I've read up on it, but until I get into it I'm going to keep overthinking it.  Oh, well.  Nothing to do but to just do it.  I was able to snag a few new tools out of this project...a Hitachi framing nailer and a Ramset Hammer Shot.

Yesterday we made a Home Depot run to Alpena.  The closest Lowes or Home Depot to us are in either Gaylord or Alpena, and are an hour away.  Building a detailed list of needed materials, and then padding it a bit, is now a necessity for us.  Making a quick run back to the store just isn't a possibility.  I think we did pretty well, but I won't know until I start working on it.


I'm hoping that work cooperates and that Monday evening we'll be able to get the insulation up and start on the framing.

Talk to you all soon!