Finally! I am
finally getting back to work on the seemingly never ending basement finishing project. It's been long enough that a quick review of the project to-date is probably in order. Our home is roughly 30' x 30', and has an unfinished basement. It's more a partially buried foundation than a basement really, being only about 25% below grade and having five full size double hung windows.
We're actively using the space, so I've been working on one quarter at a time. To date, in half of the basement, I have removed all of the old baseboard heat registers, removed and re-routed all electrical conduit and boxes that were mounted to the walls, sealed all of the holes in the walls from the removed electrical conduit and boxes as well as any cracks in the mortar, painted the walls with Dry Lok and the floor with concrete floor paint, insulated the exterior walls with 2" rigid foam insulation, and framed the exterior walls. Below is the second quarter of the basement, with all of the above completed.
 |
|
I'm well into the third quarter of the basement, and prior to this weekend I had done everything needed to get me to the point of insulation and framing. Yesterday, on one of the two walls in that section, I added blocking at the top of the foundation wall to attach the top plate for the new wall, and installed the insulation. I was hoping to get the framing done, but the insulation took longer than I anticipated. I had to cut around two windows, two electrical conduit runs (providing power through the exterior wall and out to the well pump and barns), and an antenna cable.
Here are the requisite before and after shots of the space.
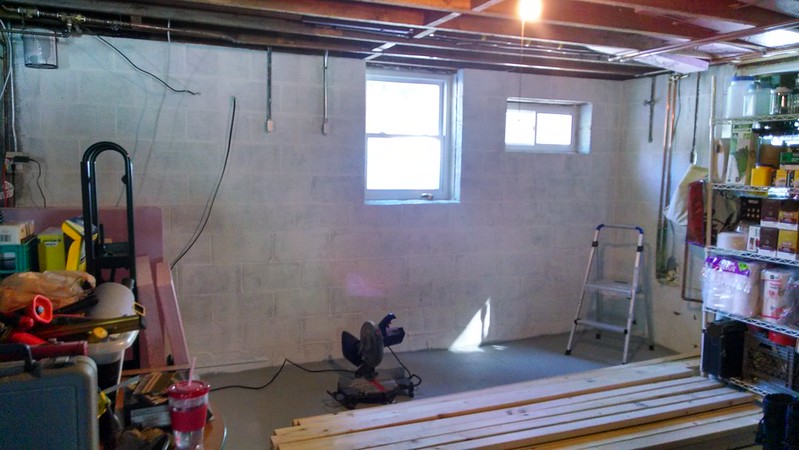 |
| Before |
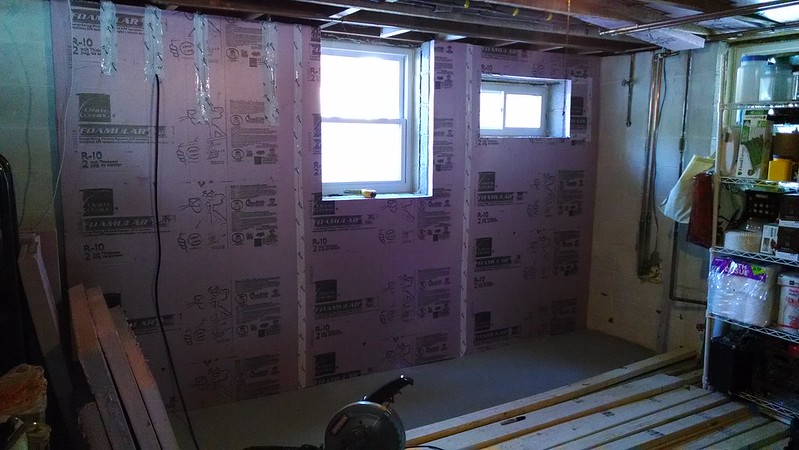 |
| After |
I'll be framing out this section of wall then moving to the wall on the right. I have some plumbing to reroute on that wall, but nothing too drastic. I've already moved the main line coming in from the well pump to get it off the wall. I now only need to cut and cap a line for an outdoor water spigot. After framing I'll be replacing that spigot with a faucet with both hot & cold, fed from supply lines that used to feed to a sink located in the master bedroom. Yes...a sink...
in the master bedroom. No complaints here, because I now have hot and cold supply lines with shutoff valves all ready to go, and I just need to tie into them to have hot and cold water outside. Want to wash a car and need hot water? No more going into the house to fill up that bucket. :)
That odd, small window on the right in the picture was originally a metal door/chute for tossing in firewood for a wood stove. The wood stove in the basement is long gone, and now so is the metal door...which was a major source of cold air intrusion. I had considered bricking in the hole, but having the window installers slip a slider window in there saved me some labor and gives us just that much more natural light into the space. It adds a cool little framing challenge for me, too. One good decision I made with this project was assessing the difficulty of each section, and then starting with the easiest and working towards the hardest. Now that I'm getting into the far more difficult half of the basement I have a bit more confidence from the experience gained in the first half. :)
More to follow...and soon, I hope.

No comments:
Post a Comment
Thank you for your comment!